July 2021 Cultural Notes
July and August are the primary growing months for your mums.
Topics of our concern and guidance during this time are:
Lateral selection and control,
Staking,
Feeding,
Pest Management,
Watering,
Flushing your pots,
Top Dressing, and
Taking the buds for the final bloom selection.
1 Lateral Control:
As side laterals develop after the final pinch, select the number of laterals to carry through the summer and remove all other side shoots. Generally the topmost lateral below the stem break is removed, as it is the weakest lateral structurally and easily broken off by accident. At this stage you should carry 1-2 more laterals than you want at bloom stage. An old saying goes “I grow one for the bug and two for me”.
Surplus laterals are removed later using the following guide.
– For #1 & #2 cultivars carry 2 or 3 laterals initially, cull back to 1 or 2 in late August after buds are secured
– For #3 cultivars carry 5 laterals initially and cull back to 3 or 4 in September or October
– For #4 & #5 cultivars carry 4 or 5 initially and cull to 2 or 3 in September
– For Earlys (#13-15, and 23-25) Cary 4-5 laterals initially and cull back in September as appropriate.
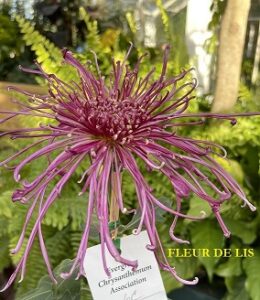
– For Spiders, quills, spoons, singles etc. Follow the guide for #4s & #5s
2. Staking:
All the saved laterals should now be individually staked to prevent losing them to wind, rain, accidents etc. You will need stakes ranging from 3’ to 5’ depending on the normal height of the individual plants, with the majority being in the 4’ range. The kind of stake is personal preference. Generally our membership use square wooden, round bamboo or round fiberglass stakes. Wooden stakes can be made from ½” or 5/8” fence boards cut into 1/2″ or 5/8″ squares. A 6×8 foot cedar fence board will yield about sixteen 1/2″ square stakes. Don’t use Pressure treated lumber! If you choose to use square wooden stakes be sure to make a point on one end so that when you push them into the pots they don’t tear away large sections of the roots. Regardless of the staking material, stakes look better and won’t rot easily if you paint or stain them green.
When the laterals are 1 -2 feet long, start fastening the laterals to the stakes with 4-6 inch twistems. Be careful not to pull the laterals away from the main stem as you can easily break the laterals if you spread them much.
3. Feeding & Top dressing:
Keep feeding! Keep feeding! The club sells 20-10-20 water-soluble fertilizer at our meetings @ $3.00 per 1# bag. This is the recommended fertilizer for mid-season growing-July & August. While other fertilizers may be your choice this balanced fertilizer has been our staple since we started growing in soilless. Miracle grow is generally not recommended as it contains too much Nitrogen and tends to produce a much taller plant at the expense of stronger roots. However if your goal is to have a plant with 11 to 20 laterals then the nitrogen in miracle is the way to go.
-After 3 weeks in the final pot start the summer feeding program with 20-10-20 water-soluble fertilizer
The standard dosage for 20-10-20 is 1 tsp per gallon of water, fed once a week. If you feed with every watering you should cut the dosage to half that or less. It is common to gradually increase the dosage up to double that for heavy feeders such as Connies, Dukes, Jessies, Ralph Lambert, Gigantics, Harry Gees, Elsie Prosser etc. On the other side, most reds and Purples and most incurves require a lighter feeding level such as 2/3 tsp per Gal. Keep in mind that it is very easy to overfeed so be prudent. Watch and feel the leaves to gage the fertilizer needs. If leaves tend to be hard and curl up or the upper leaves turn over you are feeding too much.
-Some plants may tend to be yellowish instead of green (Jessie Habgoods, Dukes, Lundys and Connie’s) for instance. If you have yellow plants first try drying the plant out with less water. If unsuccessful feed ½ to 1 tsp Epsom salts (Magnesium Sulphate) per plant. Leaf feeding with liquid Iron products such as Sequesterine or chelated Liquid Iron will also help green up the plants. Also, you might need to add some lime to sweeten your mix. Try adding ½ tsp per pot of slacked/hydrated lime. PH control should be addressed for all your plants. If you have general yellowing on new leaves or green mold on the pot or soil, it’s a sign of acidity. In general you could add ½ to 1 tsp slacked lime once a month until housing. In general a PH from 6.25 to 6.5 is desired. If you increase the PH too much on reds and purples the bloom color will be less bright.
– Continue this feeding program right up to the bud formation, then drop to approximately ½ tsp per gallon through most of the bloom formation. Heavy feeding during the early bud growth can seriously deform the buds.
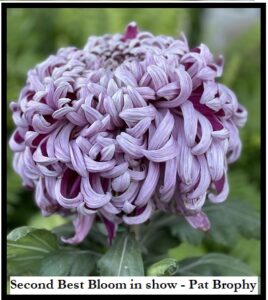
-Water thoroughly when you water but don’t water until the plant needs water or feed. Jessie’s and Dukes generally require less water than most, so don’t water them just because you are walking by with the hose. On the other side, Gigantics and Pat Brophy need more frequent watering. In following your watering program, it is good to let your pots dry out a tad before re-watering as that tends to promote stronger roots. Note: I did not say you should let your pots dry out during the starting stages, nor during the bloom stage.
4. Flushing:
If you are growing in a straight Soilless mix such as M&R you should flush your pots every 4-6 weeks to get the excess salts out of you medium. If you are mixing compost or loam with your soilless the excess salts will be absorbed by the soil and flushing isn’t generally necessary. Never the less it’s a good idea to give your pots a good flushing once or twice. For flushing, fill the pot with clear water, let it drain, refill and drain twice more. After you have completed the flushing, there will be little feed left so it’s a good idea to add a new weeks’ supply of fertilizer.
5. Top Dressing:
Top dress the pots in late July or early August and again when the buds show color (around Sept 1 to 15). Spread 1 to 2 hands full of your final potting mix on each pot. This gives the upper roots a better growing environment.
6. Pest Management:
Continue to review your pest control program every 1-2 weeks. You need to keep the plants free of black aphids, other bugs and fungal diseases, especially before the blooms open. Aphids in the blooms are unsightly and can cause your bloom to be downgraded or disqualified by the judges.
Marathon systemic insecticide is applied once per growing season to each pot at the rate of ½ tsp per pot to control aphids, (particularly black aphids). It is imperative that all members use Marathon as an outbreak of black aphids can destroy your whole crop and spread any virus you may have to many other plants. Some other insects such as leaf hoppers, leaf rollers, earwigs and Capsid bugs need to be picked off the plants or they will invariably ruin the bud. Earwigs are particularly dangerous, and a product called Seven when spread around the roots and or sprayed on the plant can be very effective in controlling them.
7. Disease Control:
For disease control, spray regularly with a fungicide during the summer and fall season. Fungal damage to the leaves will result in significant penalties by the judges. The plants you grow are fairly lush which makes them a great target for Fungi etc. I use Daconil exclusively. It’s the best I know. It covers Botrytus, Early blight, Rust, Late blight, Ring spot, Powdery mildew and other diseases that we typically associate with the heavily fertilized mums. It’s legal and available at some garden stores. I know that McLendon’s carries it. It’s also in demand by Rose and Bean growers. A word of caution: as advertised on the bottle, always use a good fine mesh Nasal filter with Daconil and don’t expose yourself, others, or pets to this as it can be very harmful. In particular you don’t want to get any of this spray in your lungs. See detailed uses and precautions attached to the package. Spray with fungicides every 2-3 weeks, don’t wait until the fungus is visible. I always thoroughly spray my pots when I clean them for housing.
8. Taking the buds:
From mid-July to late August the terminal buds will start to appear on the laterals, followed by a ring of smaller buds just below the main bud. The ring of smaller buds just below the terminal bud must be removed, leaving only the single bud on each lateral. This process is termed “Taking the Bud”. Before attempting to remove ring of smaller buds, allow them to develop to about ¼ inch. Taking the bud at this point minimizes damaging the main stem and primary bud. To remove the buds simply push them sideways with your thumb and they will easily break off. At this time it’s a good idea to add the bloom support stick i.e a small 16” long stick, tied to the main stem and to the support stake. This support will keep the growing stem straight and the bloom sitting square on top.
As a note we will be changing our fertilizer mixture by adding more Potash after the bud is taken. The August newsletter will cover this in more detail.


